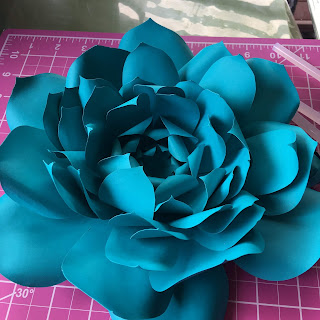
Still here? Good. Let's do this!
The template I used for this tutorial can be found on the JoAnn Fabrics website. Click Here!
The materials I used are:
-Cardstock (whichever thickness, color, texture... you prefer)
-Hot Glue (sticks and gun)
-Small Dowel (paintbrush handle, glue stick, pencil... anything to help roll the paper)
-Template
Optional:
-Cricut
-Cutting Mat
-Weeding Tools
 |
| Another option is a cute little companion to sit by your feet while you work. Oliver loves being right under where I'm working, both in the office and the kitchen. |
I downloaded the template PDF, snapped screenshots and loaded them into my Cricut Design Studio to make them cut files. I wanted to make a smaller succulent than the green one I made the day before, so I did not cut the largest shapes. Regardless of how you decide to use the template, be sure that you make two copies of the largest shapes, because they are only halves.
Here is my step-by-step walkthrough.
 |
| This is the template being cut using Cricut Design Studio. |
 |
| Cricut hard at work. It really saves so much time. |
 |
| After the shape is cut out, weed away all of the scrap paper. Then, carefully peel the shape off of the cutting mat. |
 |
| Everything is cut out and ready to go. I also cut out a cardstock circle to use as a base. |
 |
| On the largest of the shapes, I cut each petal off to be placed independently. Then, I cut a slit in the bottom, so I can overlap it, causing the paper to stand up from the base. |
 |
| This is the bottom overlapped to increase dimension of finished product. |
 |
| Because I didn't use the largest shape, my 2nd largest piece is this full section. |
 |
| I cut all of these style of shapes in half. That way I can overlap the bottoms and add dimension. You could also cut them into thirds or fourths. |
 |
| You want to do this to all of the pieces. It gives the succulent a more realistic and attractive shape. |
 |
| All of my sections are cut in half, with their slits, ready to roll. |
 |
| For the largest pieces, I also roll the edges back. You can do this however you think it looks best. There is no wrong way to do this. |
 |
| My six largest pieces are all curled, so now I will push them aside to work on ALL of the tiny pieces. |
 |
| I flipped them all over so I could keep them contained, and still work from largest to smallest. |
 |
| I make a circle out of cardstock to use as my main base. I lay out the largest sections and eyeball where I think they will need to be for the best symmetry. |
 |
| This is when I hot glue the inside tip, which projects the paper off of the base. |
 |
| This is after hot gluing all of the largest petals to the base. If you prefer, you can put them closer together and overlap the pieces. |
 |
| When adding the smaller sections, be sure to stagger them. You want to try and keep all the gaps filled. |
 |
| This is after laying down the 3rd layer. Just keep working in and staggering. |
 |
| The 4th section is where I originally had it rolling inward. I quickly realized that I didn't like how that looked, and after attaching the 5th section, I went in and re-rolled parts of them backward. |
 |
| Different paper will lay differently. This was a thinner, less textured paper than I had previously used, but the color perfectly complimented the original, so I went with it. |
 |
| I am so pleased with the finished product. |
 |
| This might be my new favorite color. |
 |
| I can't wait to see these on my bulletin board! |
And there you have it, every step of the process. Really, you can do this project however you want. As long as you are happy with the outcome, it's a success. I hope that this tutorial was able to help you with creating paper succulents for your own use. Be sure to drop me a comment and let me know how it worked out for you!
Happy Crafting!
-Tara


No comments:
Post a Comment